How Foils Work On Foiling Dinghies
Book Extract
Overview: Foils provide lift, like an aeroplane’s wing, but need controls to provide lift when required and then to level out the flying height.
T-Foils
Hydrofoils for dinghies have really been developed around in-line T-foils. Whilst foiling dinghies have also used other configurations (Cherub, Quant 23, FLO 1), the scope of this article and the techniques we use will focus on the more conventional in-line T-Foils.
This type of foiling dinghy has two horizontal foiling surfaces, each one of these attached to a vertical foil. One is placed where we would conventionally put the daggerboard and the other on the rudder. The main horizontal foil has an adjustable flap on its trailing edge. The rudder foil has no flap but can generally have its angle of attack changed manually by the sailor on the water via a twist grip in the tiller extension mechanism.
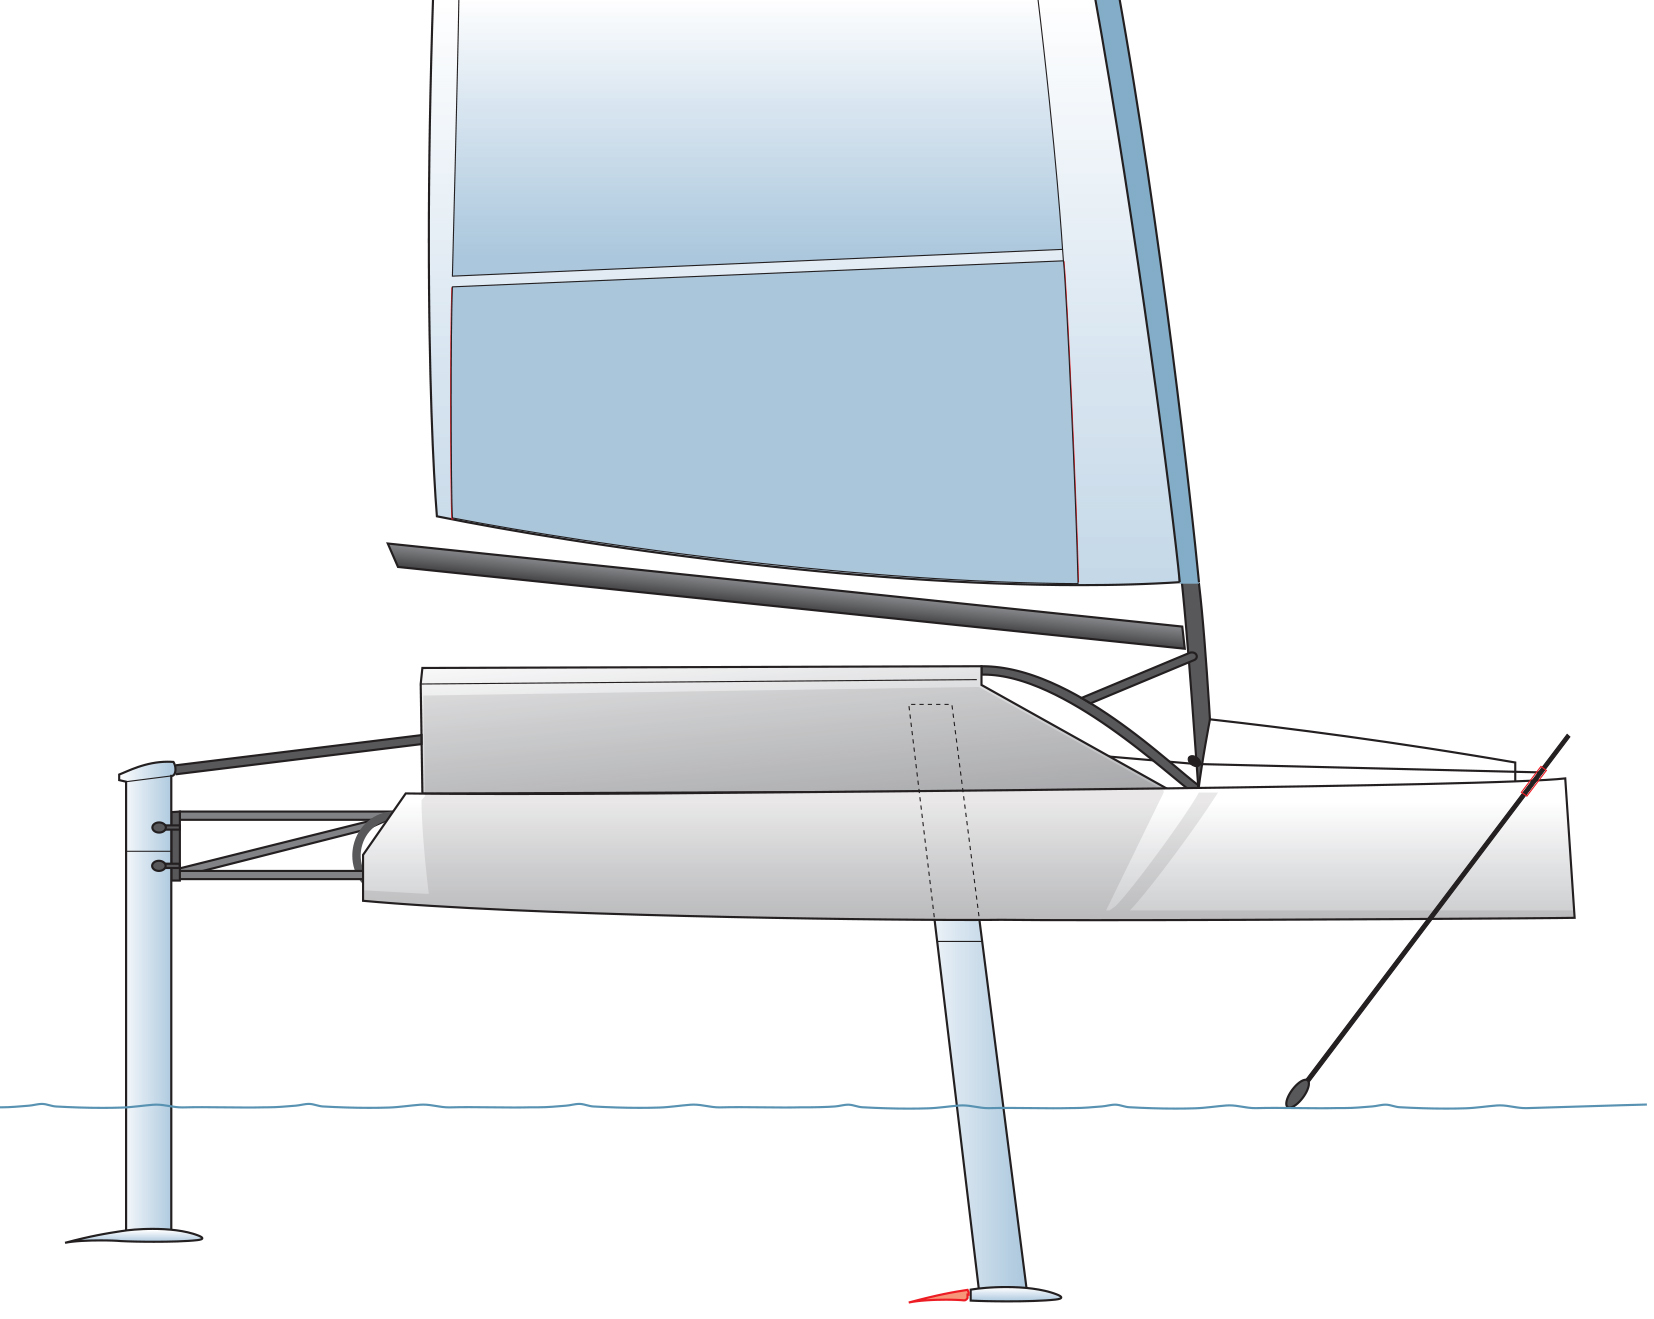
The daggerboard and rudder are replaced with 2 vertical foils with horizontal foils on the end
The idea is that the boat lifts up onto these foils (just as an aeroplane takes off using its wings), so the hull is no longer in the water. This reduces the drag and dramatically increases the speed.
The highest speeds can be obtained ‘flying’ with the hull as high as possible out of the water because this minimises the amount of the foil that is in the water and the drag it causes and can give a much greater righting moment from the sailor’s bodyweight. However, as soon as any part of the horizontal foil comes out of the water, the hydrodynamics break down and a wipe-out is likely. So, there is a balance between flying high for speed and flying lower for reliability, stability and safety.
The clever bit is how these foils are controlled to provide lift when required, but to stop providing lift when it would take you too high and possibly out of the water and into a crash.
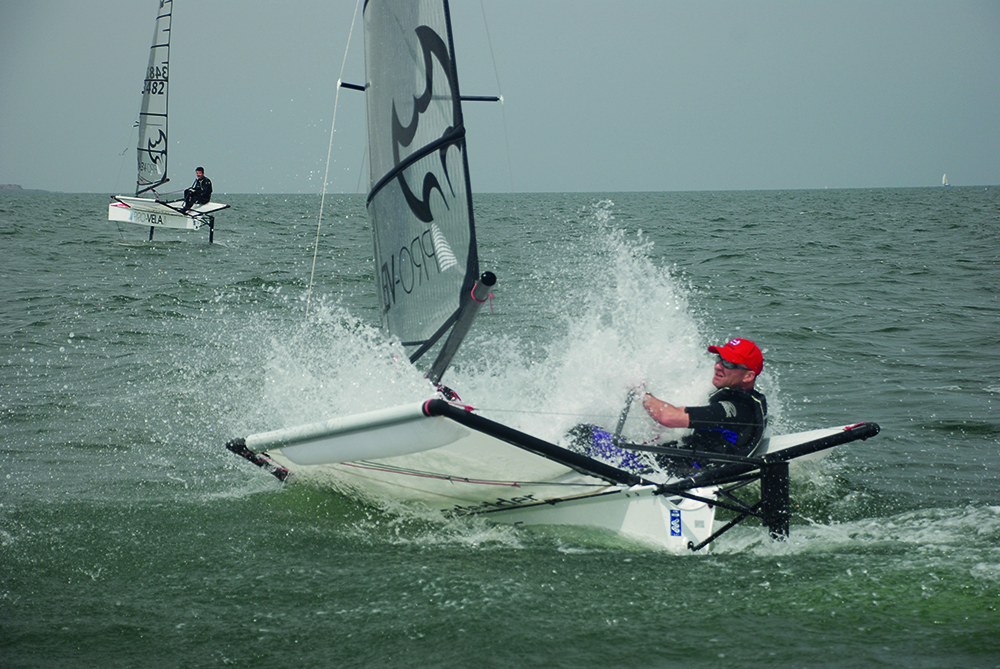
Hydrofoils do not work well in air: if you fly too high, you will come down with a bump
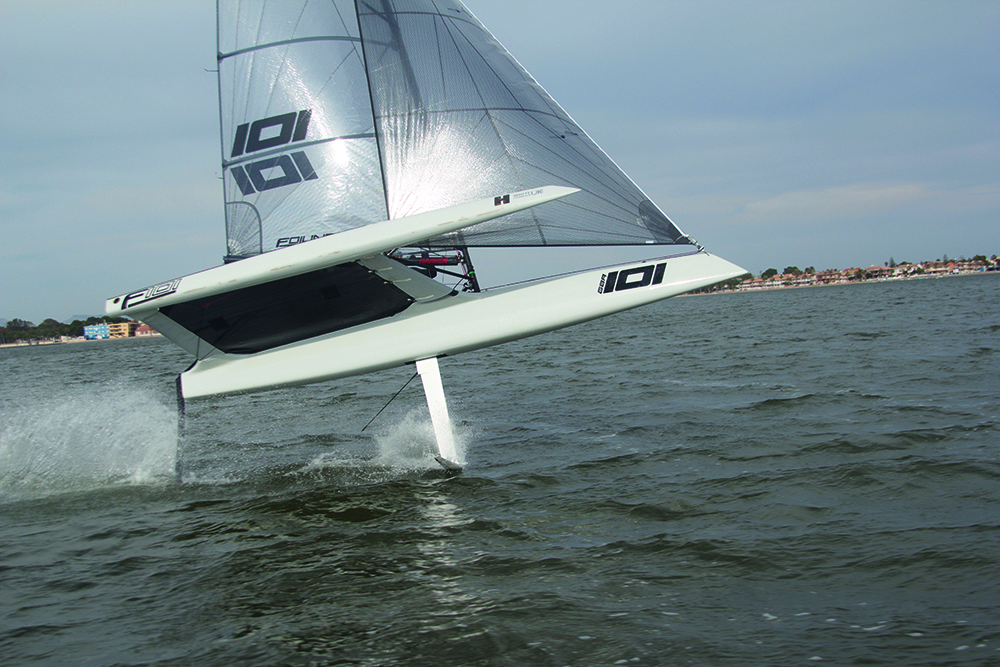
Front foil coming out of the water means the foiling is over
The Control System
The control wand is typically located at the front of the boat (e.g. International Moth) or attached to the back of the daggerboard (e.g. F101, Laser, Aero). The wand mechanism is a device, which controls the height at which the boat will fly out of the water by adjusting the trailing edge of the main foil (flap), very much like the flaps on an aeroplane wing.
Starting from the bow of the boat this is how it works: When the boat is moving slowly through the water the wand is pushed backwards against the return elastic by water pressure toward the water surface. (On the Moth this elastic is attached to the May stick – a rod that extends beyond the end of the wand to provide enough leverage for the elastic to pull the wand down against the water.) The wand moves a series of push rods that push the flap of the main foil downwards into a position where it will give vertical lift and, if there is enough forward speed, it will generate enough lift to raise the hull out of the water.
As the speed increases and the hull lifts from the water the wand is pulled down to the water surface by the pressure of the elastic. As it ‘feels’ the distance to the water surface it automatically reduces the angle of the main flap to a neutral position. At this point it stops sending the boat higher and actually levels the boat out at the ride height that the sailor has pre-set before sailing.
If the hull goes further out of the water the wand will be pulled further forwards, pulling the main foil flap past the neutral position into a negative lift situation. This will make the boat return to a flight altitude closer to the water.
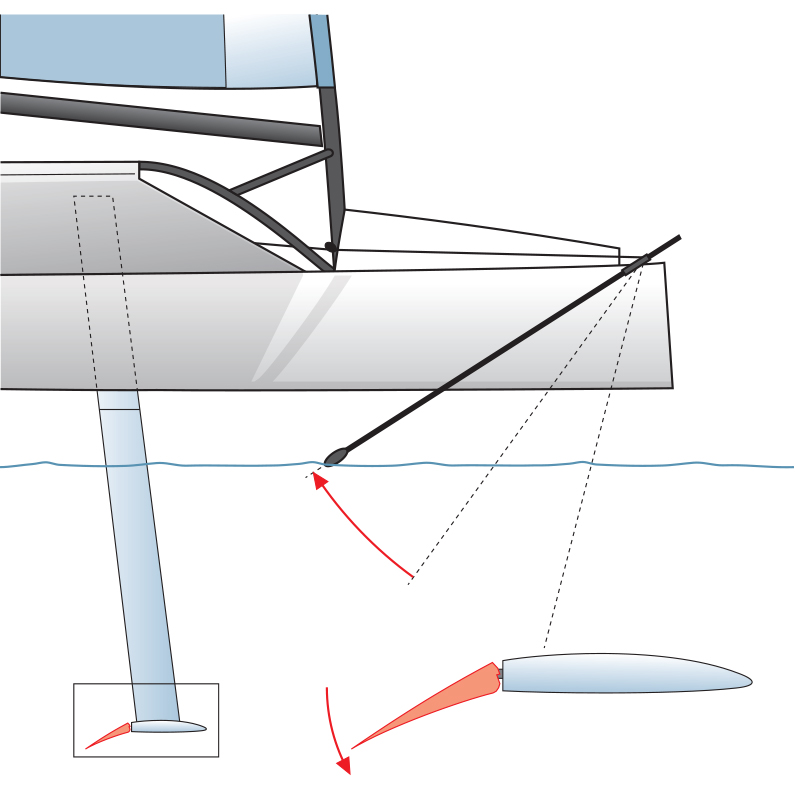
The wand back and the main foil giving full lift
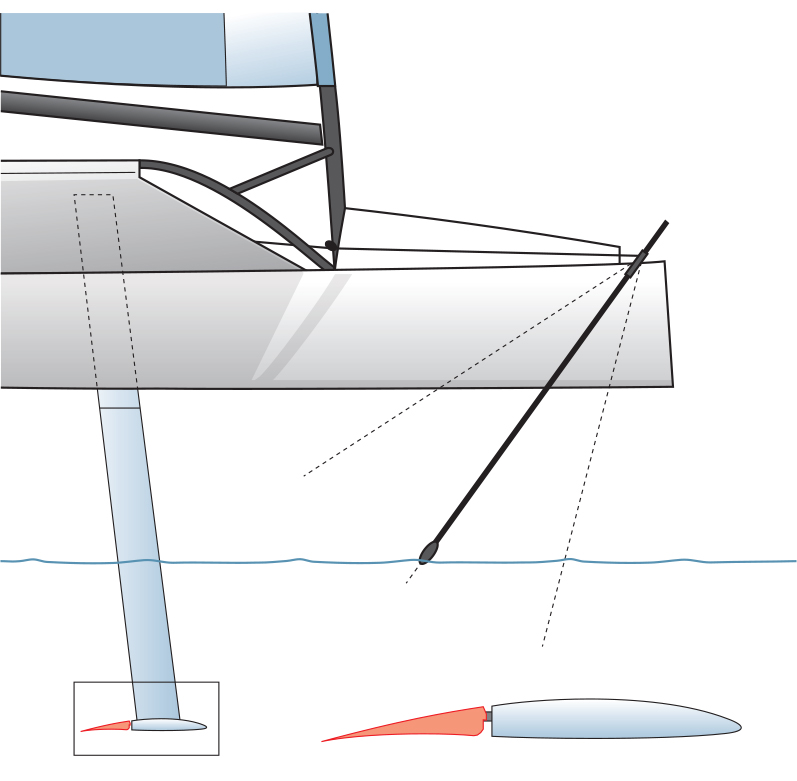
The wand near vertical and the main foil giving negative lift
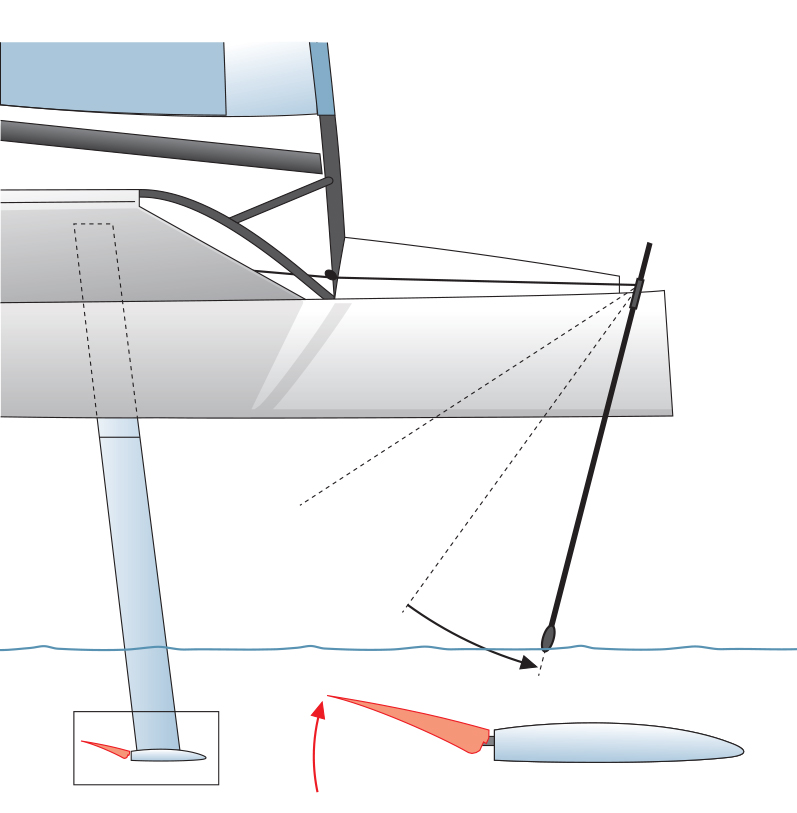
The wand at 45 degrees and the main foil in the neutral position
Rudder Foil Adjustment
At the rear of the boat the rudder horizontal foil is also creating lift as well as steering the boat like any conventional dinghy. The balance of lift is something the designer will have taken into account when deciding the size and shape of the relative foils and the anticipated crew weight and sailing position so that the boat will lift off and indeed sail at the correct level of pitch in a stable manner. The rudder foil angle can be adjusted whilst sailing by twisting the tiller extension.
Angling the rudder foil forwards underneath the back of the boat increases the angle of attack of the foil and generates more lift. This lifts the back of the boat higher, trims the bow down which decreases the angle of attack of the main foil and reduces its lift. Pushing the rudder foil backwards reduces the lift on the rudder, lifts the bow up and increases the angle of attack of the main foil which gives it more lift.
This adjustment is usually achieved by rotating the tiller extension in a clockwise or anti-clockwise direction. This action drives a worm gearing that lengthens or shortens a rod inside the tiller. This rod moves the rudder stock forwards and backwards as required to control the angle of attack of the rudder foil which controls the amount of lift and thus the fore and aft trim of the boat (also known as pitch).
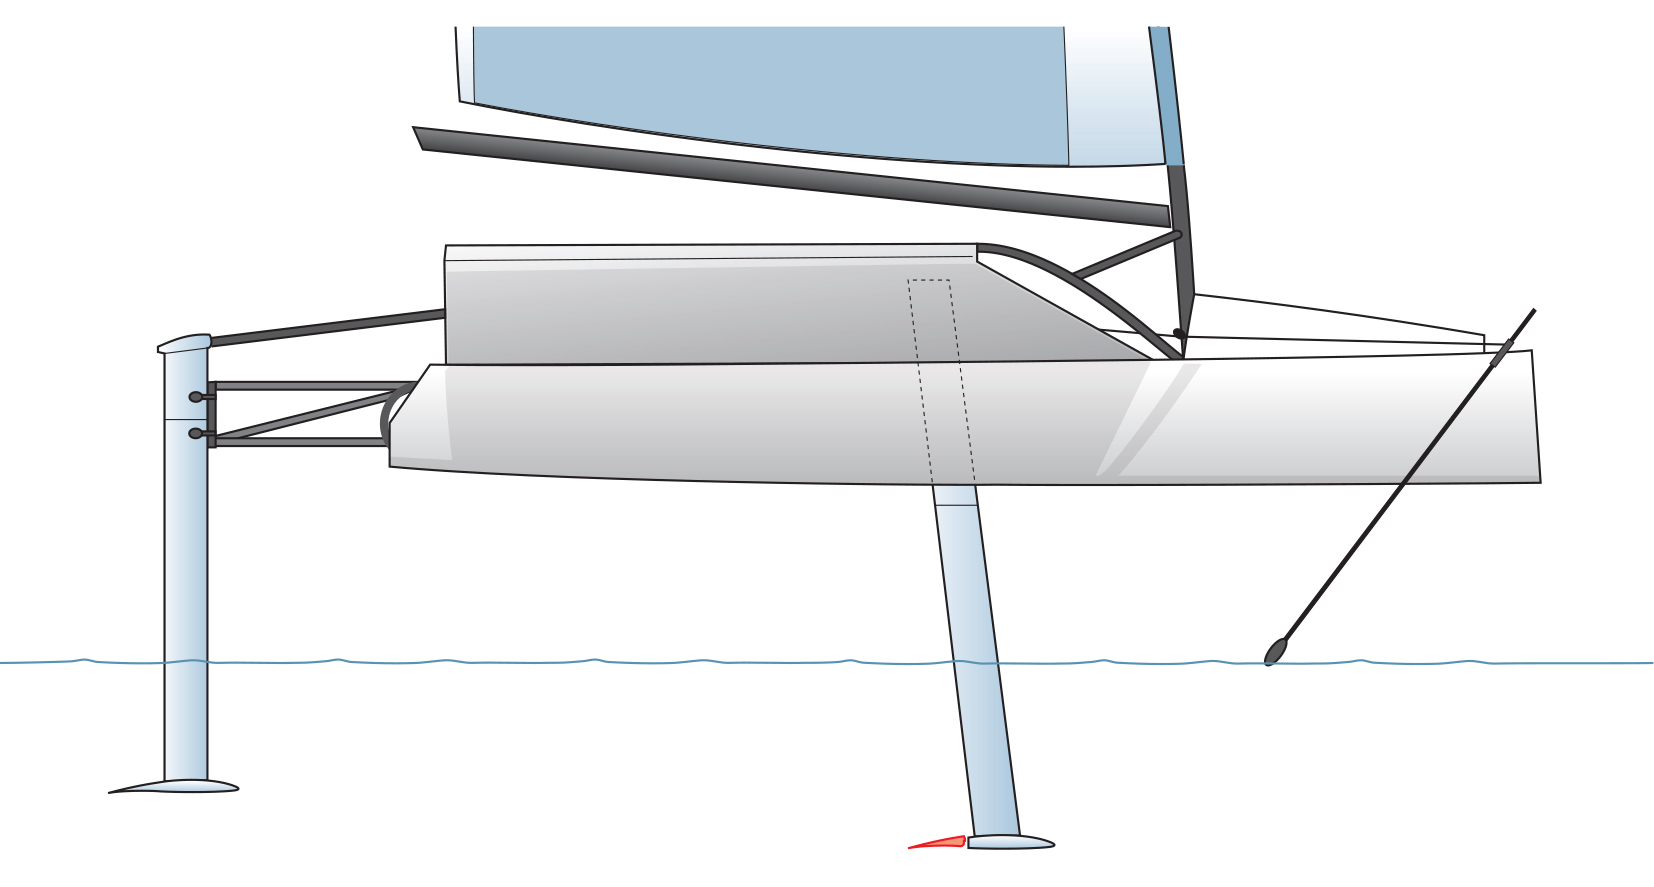
When the rudder is angled backwards, the bow is forced up
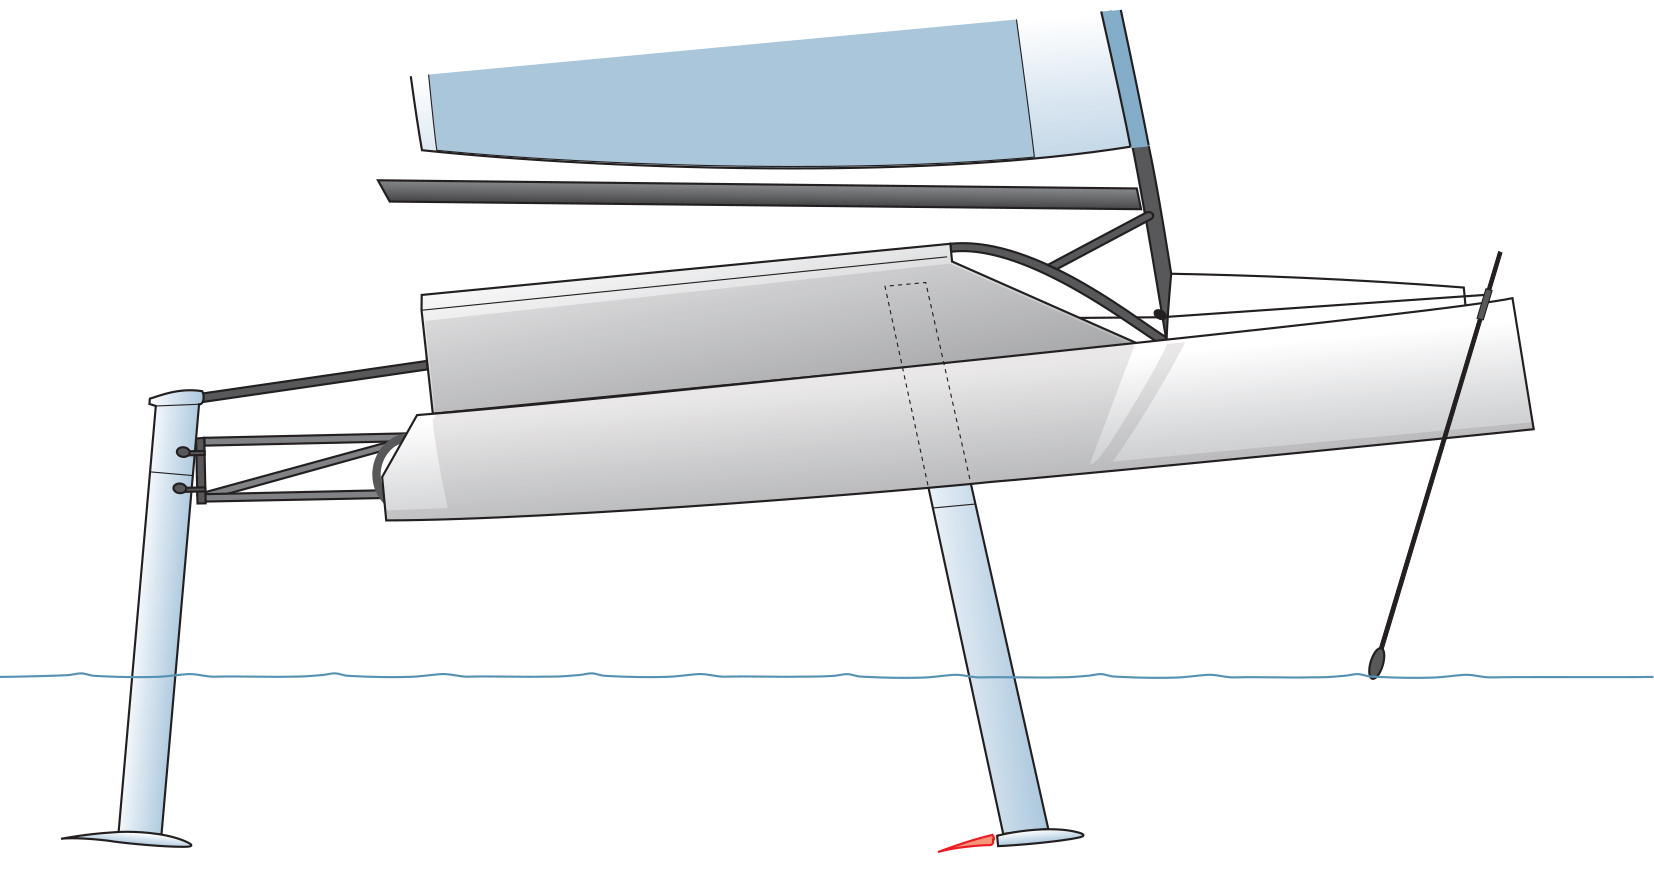
When the rudder is upright, the bow is level
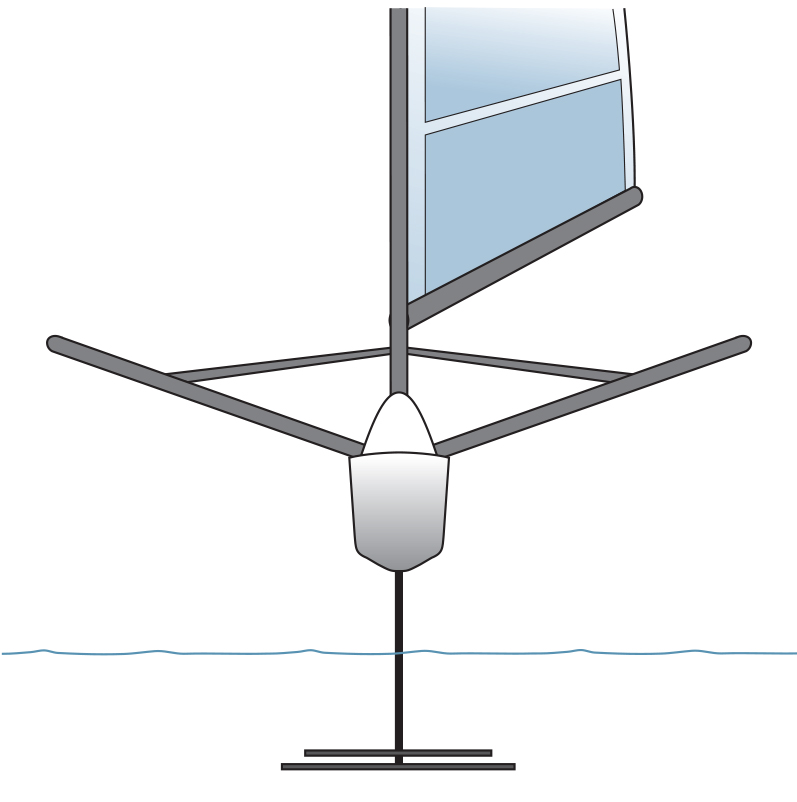
When the rudder is angled forwards, the bow is forced down
Foil Set-Up For Beginners
When you first sail a foiling boat, it should be set up so that you do not have to worry about the foils: you can just focus on the sailing of the boat. Initially, you would also want to set the height you fly at to a lower level to give a safer, more forgiving ride with a much greater margin for error.
The angle of attack of the main foil is critical. The margin of error is minimal and 0.5 of a degree will have a massive impact on the performance of the foil and how ultimately the boat performs. The angle of attack can be changed in a number of ways:
- A variety of pin positions can be used in the Moth and Waszp.
- An adjustment wheel on the F101 gives infinite possibilities to fine tune.
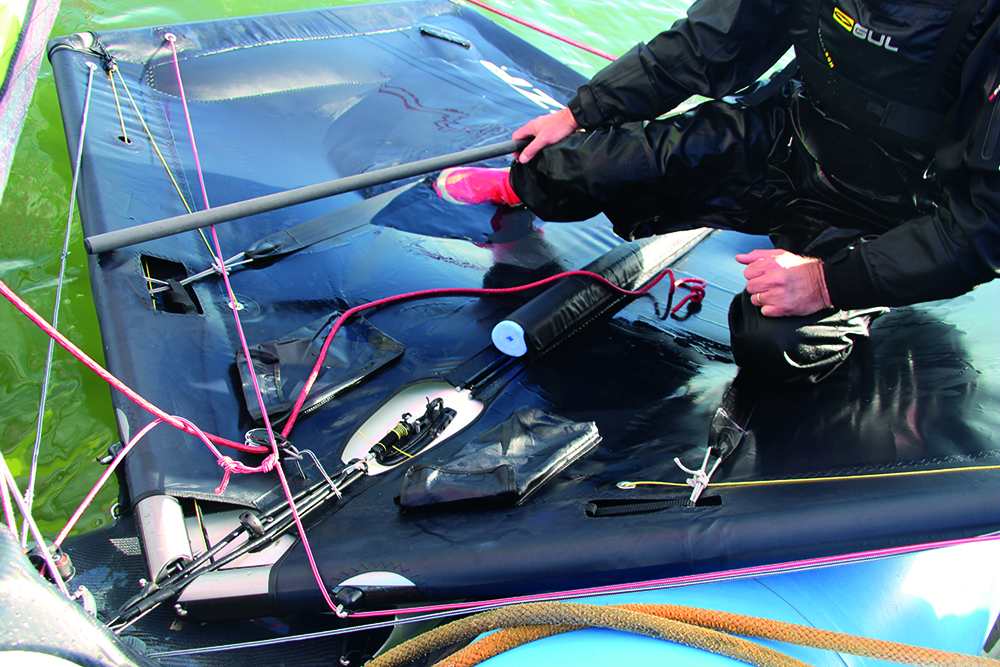
In the Moth the position of the pin controls the angle of attack
Heel Of The Boat
There is another fundamental point about the way the foils work that needs to be appreciated by the beginner at this stage. This is the angle of heel of the boat. Most sailing is thought of, explained and taught in 2 dimensions. It is perceived that sailing is mainly focussed on controlling the wind in the sails and the rudder and centreboard just stop the boat slipping sideways through the water and help to steer the boat. To fully grasp foiling you need to think in 3 dimensions as the different forces involved really come into focus when you are controlling foils beneath the water that you cannot even see.
If the boat is heeling to leeward (how many conventional dinghy sailors are comfortable), the angle of the foil in the water, and the forces of leeway upon it, prevents lift being generated and stops the boat from rising up on the foils. However, if the boat is heeled to windward, the angle of the foil in the water, and the forces upon it, creates further lift, and this will help promote foiling at lower speeds.
Sailing upright allows the foils to give lift in the way we have described earlier but does not give that additional lift which being slightly heeled to windward does. There is also the risk that, if you are sailing upright, a gust will cause you to heel to leeward and therefore stall out the foils. Heeling to windward will also help to increase righting moment. The mind-set is to sail the boat heeled on top of you and bringing it back on top of you immediately it starts to go upright, NOT allowing the boat to heel to leeward and then bring it flat as you might be more used to doing.
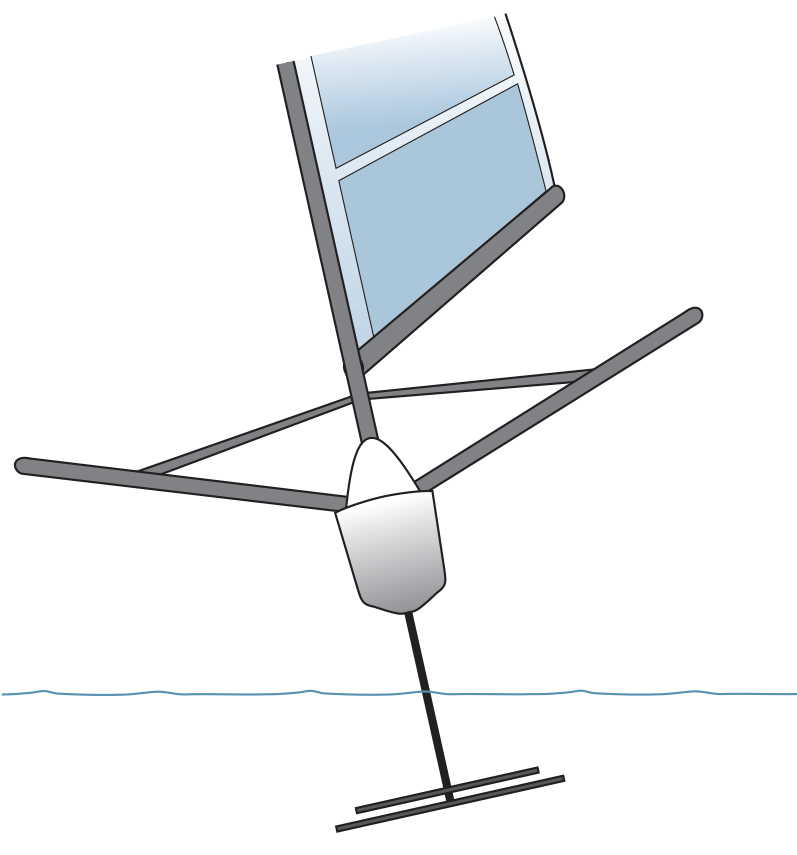
Mast heeled to leeward and foil generating negative lift

Mast upright and foil neutral
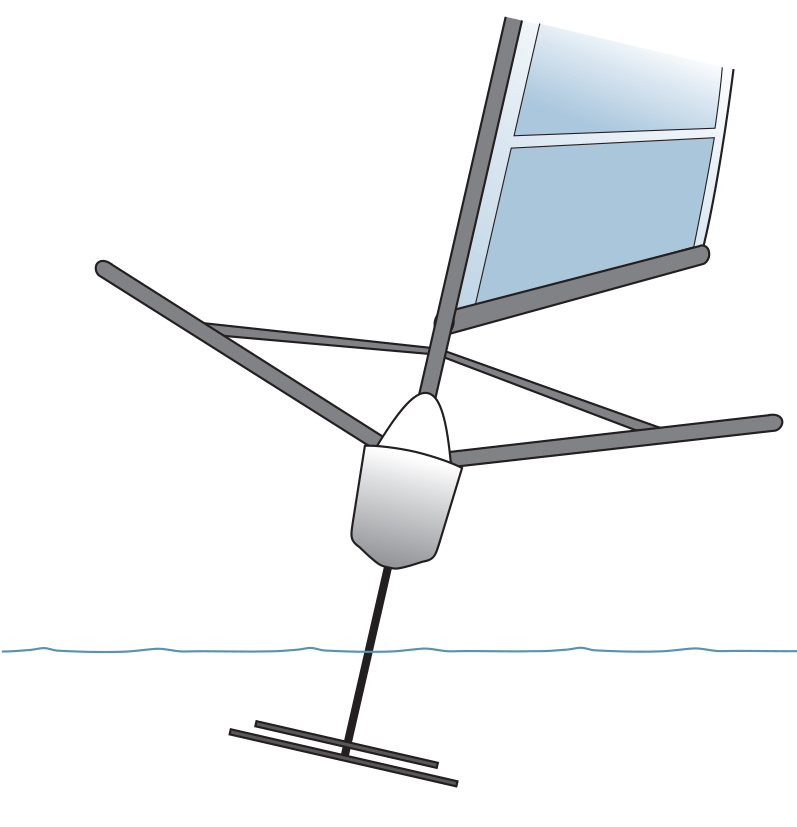
Mast heeled to windward and foil generating lift
© Not to be reproduced without written permission from Fernhurst Books Limited.
The Foiling Dinghy Book is written by the founder of Pro-Vela Foiling School and conceiver of the F101, Alan Hillman.